How to Integrate with QuickBooks Online
Eleo integrates exclusively with QuickBooks Online (not the desktop versions). This is a one-way integration, where data is transferred from Eleo to QuickBooks, with no data flowing back.
Setting Up Your QuickBooks Integration
Connecting to QuickBooks
- In the upper right-hand corner, click on your profile icon, and then select Site Settings.

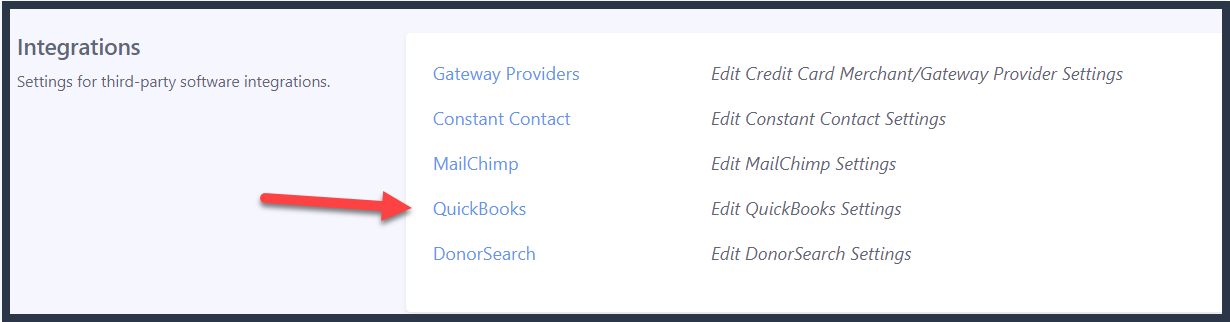
- On the Jump to Navigation, select Integrations.

-
Then select QuickBooks.

- Press Authenticate with QuickBooks to Continue.

5. You will be prompted to login to your QuickBooks Online account.
NOTE: You will need your QuickBooks Online user ID and password!
- Once you have logged in, you will be taken back to the QuickBooks Settings page which should now look more like the image below. This means you are connected!

Setting Up Your QuickBooks Integration
- Now there are a few more initial steps. You will need to map all of Eleo's payment types to your QuickBooks Payment Methods. If there are any options you do not use, you can just code them as cash. Be sure to Save after making your selections.

- You also will have to map your Eleo funds to the corresponding QuickBooks accounts.

- To set up a mapping, click on the pencil icon in front of the Fund you would like to set up to link to QuickBooks.

- This will open up the Fund to modify. Select the Link to QuickBooks option at the bottom.

- You will select the Credit and Debit accounts from your QuickBooks Account to map to all gifts within this fund. The debit account will list all "Bank Accounts & Other Current Assets" from your QuickBooks Account. The credit account will list all "Products & Services" from your QuickBooks Account.
NOTE: If the account you want to use is not listed, please go into QuickBooks, add the new account and then refresh the page in Eleo. It should then appear.

If you need help adding a new "Product & Service" option to your QB, follow these steps:
-
In your QuickBooks, hover over Sales and then select Products & Services.


Select New on the top right.
