How to Add Emails to an Audience in Mailchimp
How to Create an Email Template
Create a Mailing to Send to Mailchimp Existing Audience
Quick Note About Large Lists (500+ Recipients)
Create a Mailing to Send to a New Audience in Mailchimp
How to Create an Email Template
-
You will need to have an Email Template set up before sending a list to Mailchimp. To do this, follow these steps. If you have your template created, skip to Create a Mailing to Send to Mailchimp Existing Audience OR Create a Mailing to Send to a New Audience in Mailchimp.
Go to Mailings in the main navigation, then select Email under Add/Edit Templates.

NOTE: Eleo Email Templates are just fields to be sent to Mailchimp. You will not write the body of the email in there. Emails should be written, formatted and sent directly from Mailchimp.
-
Select 'Add template'.


-
Give the template a name. You can use the same template each time you need to send a list to MailChimp.
Template Type: Should be General Mailing/Appeal
Description: Optional if you wish to add any notes about this template
Active: Status of this template. Must be active to use.
Available Fields to Include: fields you can use in your email template
Selected Fields: fields that will be sent to Mailchimp. Send To Email is included by default
NOTE: Our integration with Mailchimp currently only sends the Send to Email and First Name and Last Name to Mailchimp. If you need additional fields, you will need to download the email mailing file out of Eleo and manually upload it to Mailchimp.

Create a Mailing to Send to a Mailchimp Existing Audience
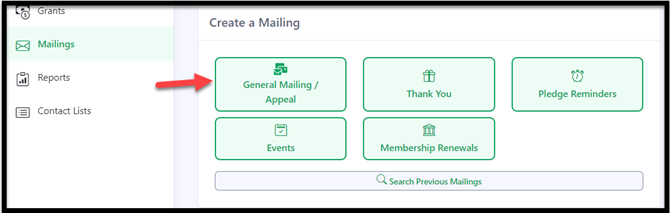
- Once your email template is created, go to Mailings in the main navigation. Then select 'General Mailing/Appeal'.
-
Choose your template type - in this case, Email.


- Then select your email template. The rest of this page will then open up.

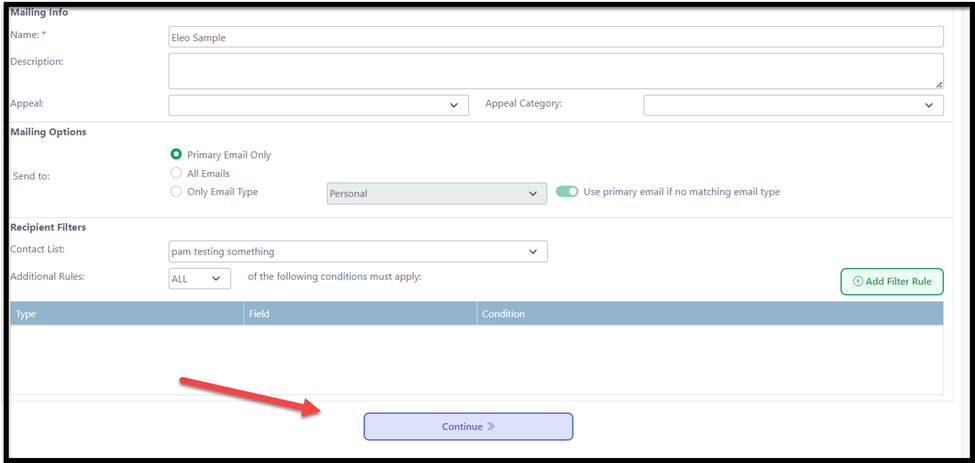
- Fill out the rest of your mailing options.
- Description: optional if internal notes needed
- Appeal / Appeal Category: optional, if you want any associated with this email mailing
- Mailing Options: Send to Primary email on file in the contact record, send to All Emails in all records selected, or only a certain Email Type to send to
-
Recipient Filters: select an existing Contact List to send this email mailing to, or Add a Filter Rule as needed to select who will be included in this mailing
When you made all selections, choose 'Continue'.

-
You will see a screen like this. It will list the contacts that met your previous filters.
NOTE: Anyone without an email is automatically excluded.
The fields shown in the grid at the bottom are just display view, and not the fields selected in your template.

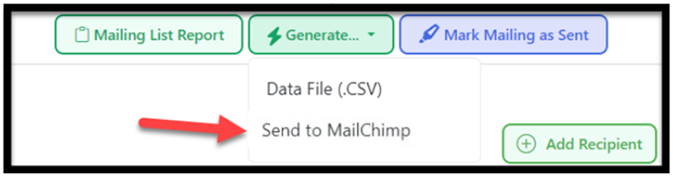
- You can download the Mailing List Report if you would like.
- Select 'Generate' - Data File (.CSV) if you have fields other than name and email to download this to manually upload to MailChimp.
- Select 'Generate' - Send to Mailchimp to send over names and email to MailChimp.
-
Mark Mailing as Sent - you may select this at any time to add a log to each person in this mailing's contact record that they were sent this email mailing.
-
After selecting 'Send to Mailchimp', you should see this screen.
If your email audience already exists, select it from the dropdown, and then press 'Send'.

-
You should get a Mailchimp Results message. You should see the names and emails you sent in the appropriate audience in Mailchimp (this may take a few moments. If you had Mailchimp open, you may need to press refresh). You will now finish and send your emails from Mailchimp directly.
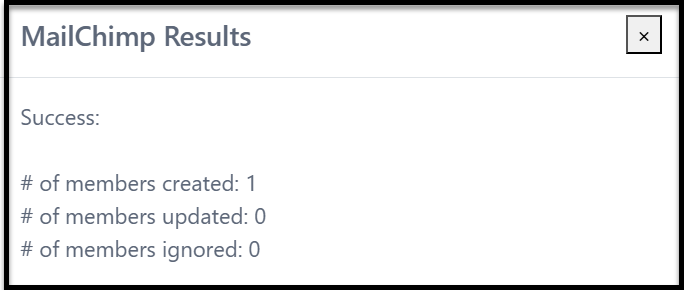

Number of members created: New emails added to audience
Number of members updated: Emails that already exist in the audience
Number of members ignored: Duplicate email addresses or invalid/undeliverable email addresses.
A Quick Note About Large Lists (500+ Recipients)
If you’re sending a list with more than 500 recipients, Eleo will automatically send the records to Mailchimp in smaller batches behind the scenes. This helps everything process smoothly through Mailchimp’s system.
No extra steps are needed on your end; it all happens automatically.
You may sometimes notice that the number of records in Eleo doesn’t exactly match the number processed in Mailchimp. This is usually because:
- Mailchimp only allows one email per unique address (so duplicate emails are combined)
- Mailchimp filters out invalid or undeliverable email addresses
This is standard Mailchimp functionality and would happen even if you imported the list directly into Mailchimp yourself.
If you ever have questions about your counts or would like help reviewing a list, we’re always happy to help.
Create a Mailing to Send Emails to a New Audience in Mailchimp
-
Once your email template is created, go to Mailings in the main navigation. Then select 'General Mailing/Appeal'.

-
Select your template and then the rest of the screen will open up. Fill out any necessary information and then press ‘Continue’.

-
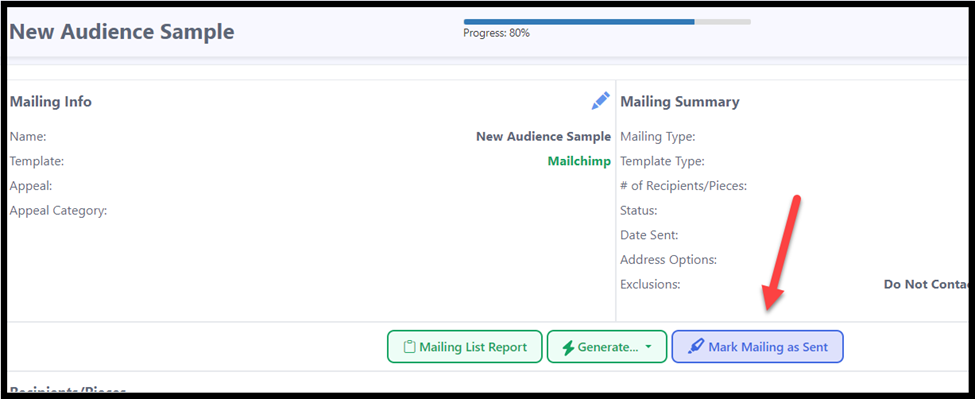
You will be taken to the final mailing screen.
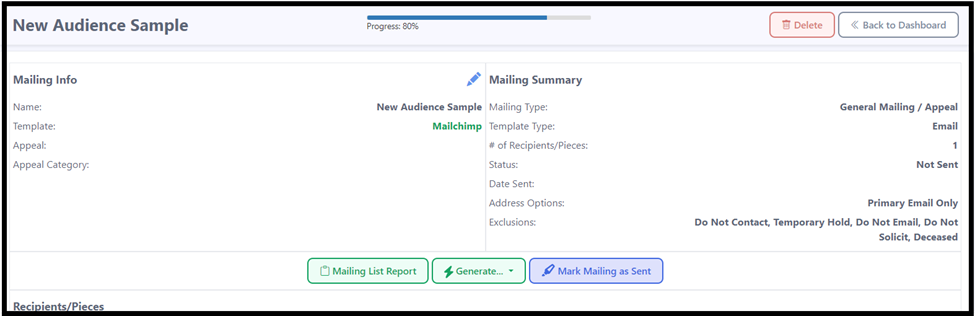
4. You can download the Mailing List Report if you would like.
-
Select 'Generate' - Data File (.CSV) if you have fields other than name and email to download this to manually upload to MailChimp.
Select 'Generate' - Send to Mailchimp to send over names and email to Mailchimp.
Mark Mailing as Sent - you may select this at any time to add a log to each person in this mailing's contact record that they were sent this email mailing.


-
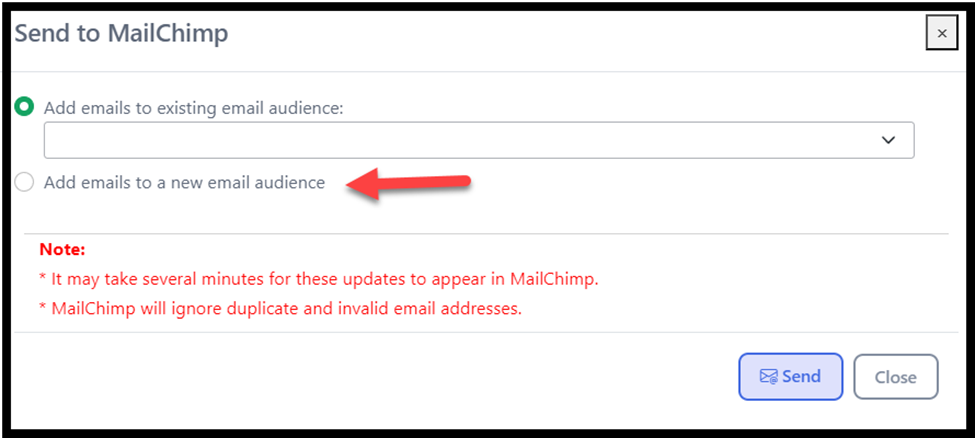
A window will open. To add emails to a new audience in Mailchimp, select that option.

-
More fields will appear. Fill them out accordingly, then press 'Send'.
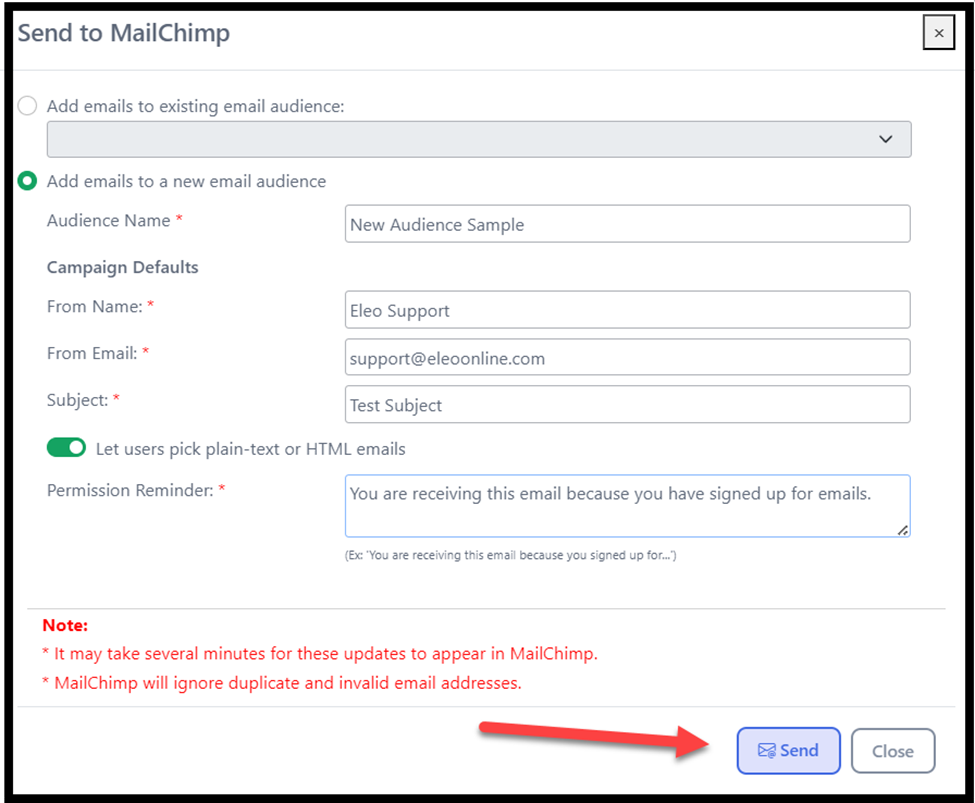

NOTE: This is sending the data to Mailchimp, NOT sending the emails. That will need to be done within Mailchimp.
-
You should see a spinning wheel and then a Mailchimp Results box:
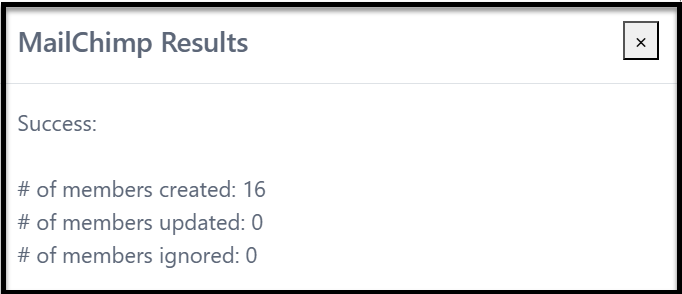
Number of members created: New emails added to audience
Number of members updated: Emails that already exist in the audience
Number of members ignored: Duplicate email addresses or invalid/undeliverable email addresses.
8. If successful, go into your Mailchimp to ensure the Audience is there, finish putting together your email and send from there when you are ready.
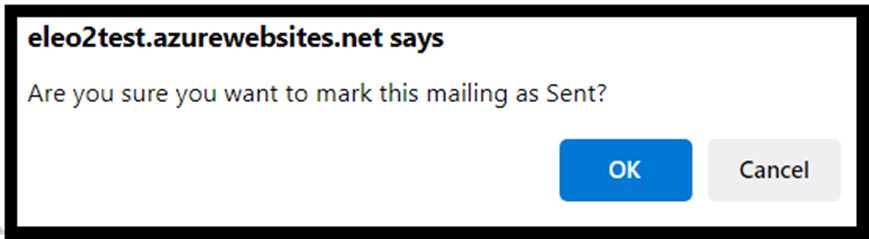
9. If you would like, you may press the ‘Mark Mailing as Sent’ button in Eleo at any time to put a log of this email mailing in the records of all the contacts included in that mailing.


-
It will prompt you to confirm, press 'OK'.
11. Your Progress bar at the top of the Mailing screen will now be at 100%!


