Donation Web Forms
- Select Form Type
- Select Format Type
- Select Template
- Basic Form Information
- Logo and Header Images
- Form Header Title and Text
- Form Fields
- Modifying Donation Amounts
- Adding an Optional Tribute Field
- Payment Fields and Text
- Form Footer Fields and Text
- Form Font and Color Settings
- Confirmation Page
- Confirmation Email
- Information Tab
- Form URL and Button HTML Code
- Health Check
- Pending Submissions
- Processed Submissions
Accessing Web Forms
- Click on the Web Forms tab in your main navigation on the left hand side.

-
It will prompt you to log into Eleo Web Forms. Use the same username and password as you do for Eleo.
Creating a Form
-
Once you are in the Web Forms page, select Create.


Select Form Type
-
Choose the type of form you would like to create. In this case, you will select Donation.

Select Format Type
- Then choose the Format Type you would like.

- Standalone Page - link to open the form in a new tab/window.
-
Embedded - The form will be embedded directly on your website, allowing visitors to complete it without leaving your site. We include a warning as we cannot guarantee compatibility with all websites, but most clients integrate our forms without any issues.


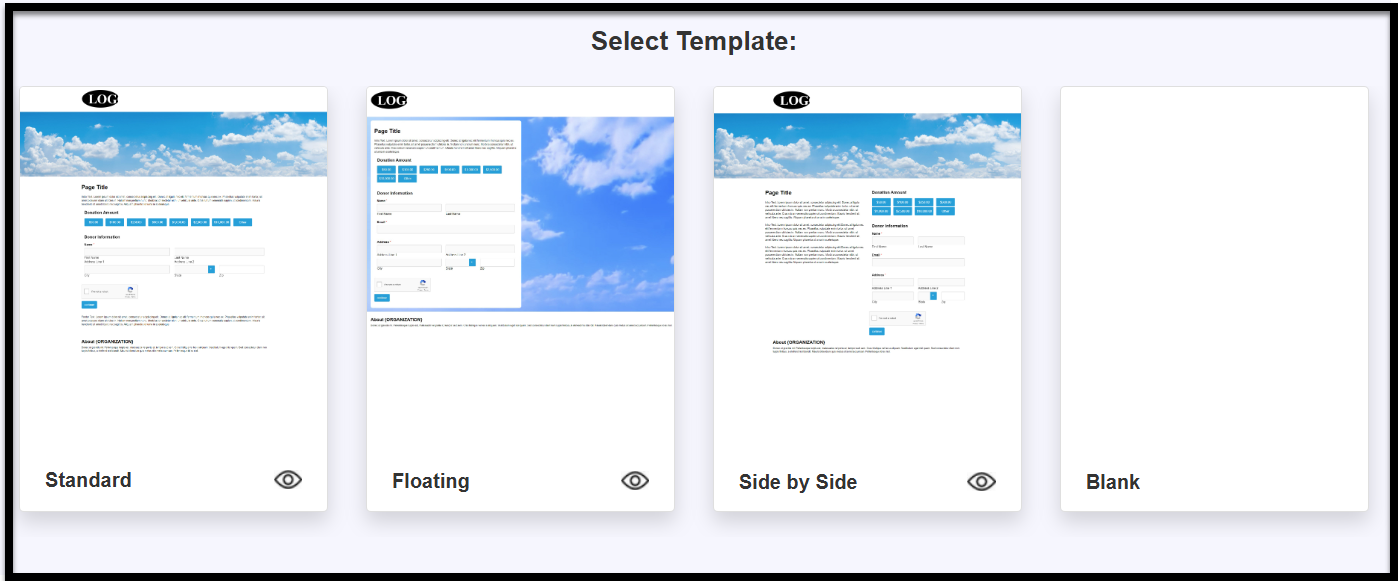
Select Template
-
Select the template you would like to use for your form.


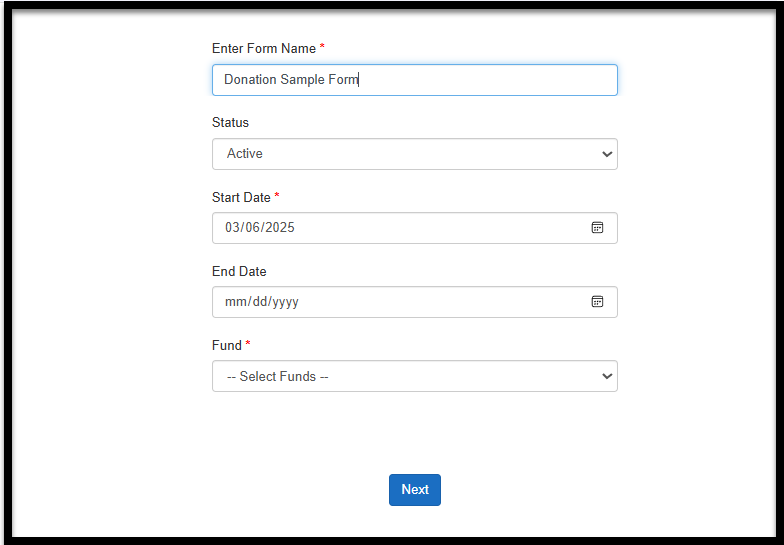
Basic Form Information
- Enter a form name
-
Status :Active – Live and ready to be used.Not Active – Form is unavailable and cannot be completed (e.g., disabled or unpublished).Pending – Form is in progress and not yet ready to go live.Closed – Form was previously active but is now unavailable because the timeframe has ended.
- Start Date – The date when the form begins accepting submissions.
- End Date (optional) - The date when the form will stop accepting submissions, if applicable.
-
Fund - choose the fund where all gifts from this form should go.
Then press Next.

Logo and Header Images
-
You will navigate through the sections on the left-hand side while viewing a preview on the right-hand side.You can add or remove a logo and header image, as well as adjust the logo's height and position.When you're done, click Next to proceed to the next step.


Form Header Title and Text
-
Next, add a Header Title and optional header text.

You can choose to Display Field Paging if you'd like. If you do, you can also change the name of each label.
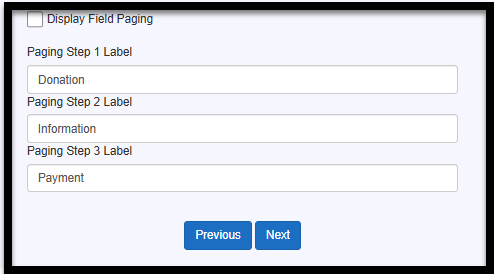


It will look something like this, so the donor can easily see which part of the form process they’re on.

When you're finished, click Next to continue.
Form Fields
-
You will now see the standard fields for the form type you selected. If needed, you can add additional fields by clicking the Add button on the right-hand side.
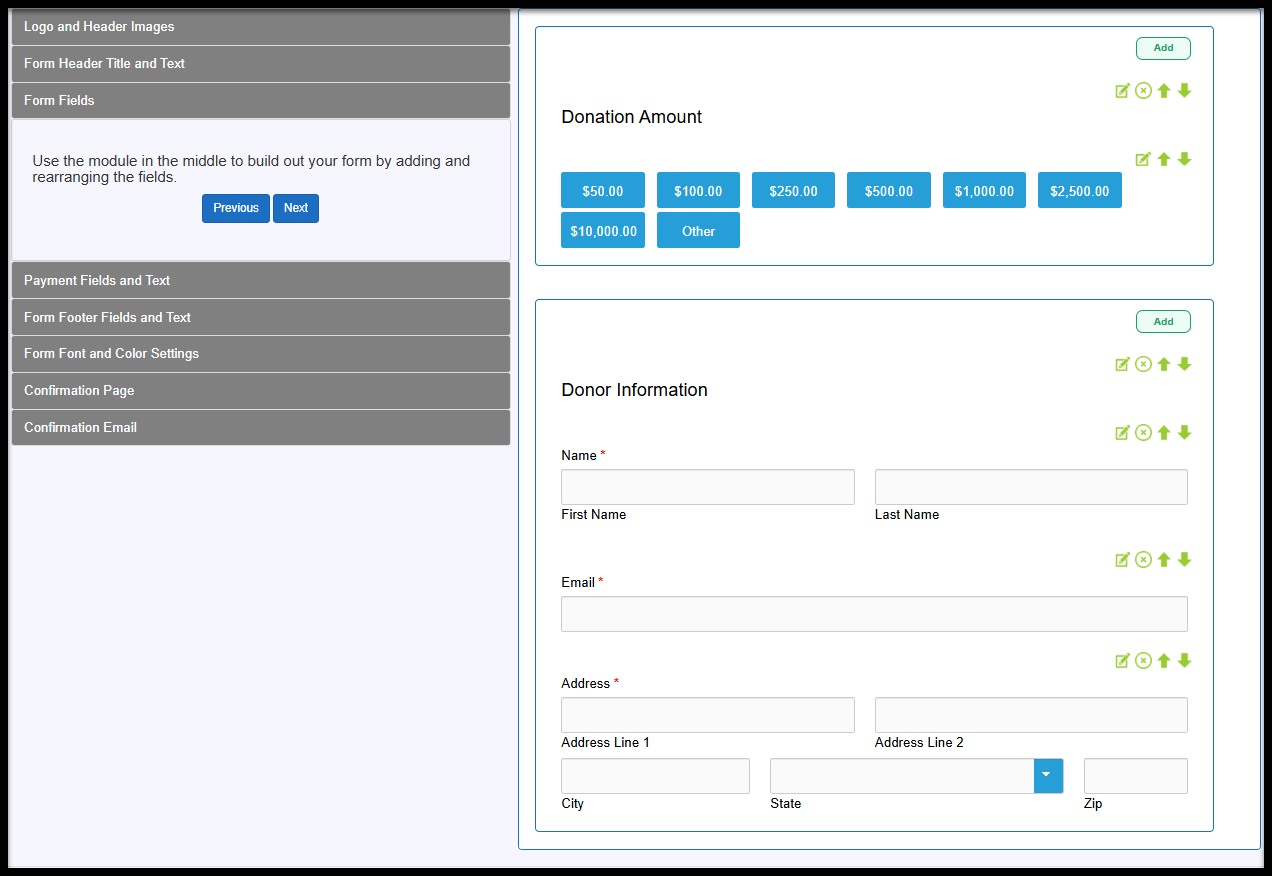


- Edit – Modify any field on the form.
- Remove – Delete a field you no longer need.
- Up/Down Arrows – Reorder fields by moving them up or down.
Modifying the Donation Amounts
If you would like to adjust the donation options available, click on the first green icon on the right of the field.

Leave it set to Donation with Options to show the available amounts. Then press Next. (The regular Donation option would give the donor a blank space to enter any amount they choose.)

You can rename the Field Label if needed. Just make sure it’s mapped to the Gift Amount field and set to "Required." In the Values box, you can update the amounts—just make sure each one is on a separate line. There will always be an "Other" option by default, and the dollar signs are added automatically, so you don’t need to include them. Adding a field description is optional, but you can do so if you'd like. Don’t forget to click Save when you're finished!

Adding an Optional Tribute Field
If you want to add an optional field to capture Tribute information, we recommend adding that as a Text Box if you want a single one line box, or Text Area if you want a larger text space.

NOTE: Although we have a Tribute field in the gift record, it is only populated once you set up the tribute. If you do not want donors to see the list of all tributes you currently have, it is best to just have it as text and manually set it up after you receive that web form submission and not map to that field.
When you are done with fields, click Next.

Payment Fields and Text
- Feel free to change the Payment Page header and the text below it if you'd like. Then, click Next.

Form Footer Fields and Text

Form Font and Color Settings
- Customize the form's font and colors, with a preview displayed on the right-hand side. When you are done, press Next.

Confirmation Page
- Select your Confirmation Page options. This page will appear once the form is submitted.
- You can choose to display the form's header and footer on the confirmation page.
- Add your own custom message.
- Include form fields that will populate with the submitted information.

Confirmation Email
-
Lastly, set up your confirmation email (optional).
- Choose to have the email sent upon form submission by checking the box (recommended). This can act as their thank-you message and receipt.
- Customize the "From" email address to make it easier to identify.
- Add a subject line for the email.
- Optionally, copy the email to up to three recipients (yourself and two other staff members).
- Write the body of your email and include form fields (selected from the right-hand side).

Viewing an Existing Form

Information Tab
This section gives you the basics about your web form, like its name, type, format, submission status, and when submissions are accepted. It also shows which Fund the donations will go to.
You can enable recurring gifts and customize the text for that section. Additionally, you can give donors the option to cover the processing fee if they’d like and create the wording for that checkbox. Here’s an example of how these options will show up under the donation amounts on the form.
